3. Integrate Papi to your web application
Integrate Papi into your application, including handling payment flows, notifications, and environment‑specific settings.
Environments
Papi provides a single production endpoint. For testing, use the test mode flags described below.
- Production (live transactions):
https://app.papi.mg/dashboard/api/payment-links
During development, set isTestMode: true in your requests to simulate payments without moving real money.
For card testing, enable Application Test Mode in your shop's settings inside the dashboard and use the dedicated test card.
Payment Flow Overview
The payment process consists of the following steps:
- Get your API Key from the dashboard.
- Create a payment link: Send an API request to generate a unique payment link for the customer.
- Redirect the customer: Use the returned
paymentLinkto send the customer to the secure payment page. - Process the payment: The customer completes the payment on the secure page.
- Receive a notification: After the payment, Papi calls your
notificationUrlwith the final status. - Verify and handle the result: Check the
notificationTokenandpaymentReferenceto confirm authenticity and update your application.
Step‑by‑Step Guide to Implementing Payment Integration
This guide walks you through integrating the payment API step by step, from setting up redirection pages to handling notifications.
You need two pages on your website where customers will be sent after payment:
- Success URL – The page shown after a successful payment (e.g., order confirmation).
- Failure URL – The page shown after a failed payment (e.g., an error message with a retry option).
Take note of both URLs – you will need them when creating the payment link.
The notification endpoint is an API you implement to receive automatic status updates from Papi.
It must accept POST requests.
Example notification body sent by Papi
{
  "paymentStatus": "SUCCESS",
  "paymentMethod": "MVOLA",
  "currency": "MGA",
  "amount": 15000,
  "fee": 500,
  "clientName": "Client Name",
  "description": "Payment for Order #123",
  "merchantPaymentReference": "MERCHANT-0001",
  "paymentReference": "ORDER-123",
  "notificationToken": "xyz789",
  "message": "Payment completed successfully.",
  "payerEmail": "customer@example.com",
  "payerPhone": "+261340000000"
}
Explanation of notification fields
| Field | Type | Description |
|---|---|---|
paymentStatus | string | SUCCESS, PENDING, or FAILED. |
paymentMethod | string | The method used (MVOLA, ARTEL_MONEY, ORANGE_MONEY, BRED). |
currency | string | Currency code (always MGA). |
amount | integer | Amount paid. |
fee | integer | Transaction fee deducted. |
clientName | string | Customer's name as provided. |
description | string | The payment description you sent. |
merchantPaymentReference | string | Internal reference from the payment provider. |
paymentReference | string | Your unique reference for this payment (from the reference field). |
notificationToken | string | Token returned when you created the payment link – use it to verify authenticity. |
message | string | Additional human‑readable information. |
payerEmail | string | Customer's email (if provided). |
payerPhone | string | Customer's phone number (if provided). |
Verifying the notification
To ensure the notification is genuine, verify that:
paymentReferencematches the reference you sent.notificationTokenmatches the one you received in the payment‑link creation response.
If both match, the notification is authentic and you can safely update your database.
You will send a POST request to generate a payment link.
The body must include the URLs you created in Steps 1 and 2, along with payment details.
Endpoint
POST https://app.papi.mg/dashboard/api/payment-links
Headers
{
  "Content-Type": "application/json",
  "Token": "<YOUR_API_KEY>"
}
Request body example
{
  "amount": 15000.0,
  "clientName": "Client Name",
  "reference": "ORDER-123",
  "description": "Payment for Order #123",
  "successUrl": "https://yourapp.com/payment-success",
  "failureUrl": "https://yourapp.com/payment-failure",
  "notificationUrl": "https://yourapp.com/payment-notify",
  "validDuration": 60,
  "provider": "MVOLA",
  "payerEmail": "customer@example.com",
  "payerPhone": "+261340000000",
  "testReason": "Internal QA",
  "isTestMode": false
}
Request fields explained
| Field | Type | Required | Description |
|---|---|---|---|
clientName | string | ✓ | Customer's name. |
amount | number | ✓ | Payment amount (minimum 300). |
reference | string | ✓ | Your unique identifier for this payment (e.g., order ID). |
description | string | ✓ | Short description (max 255 chars). |
successUrl | string | ✗ | URL for redirection after success (must be http(s)://). |
failureUrl | string | ✗ | URL for redirection after failure (must be http(s)://). |
notificationUrl | string | ✓ | Your endpoint that receives payment notifications (http(s)://). |
validDuration | integer | ✗ | Link validity in minutes (default: 1, must be > 0). |
provider | string | ✗ | Restrict to one provider: MVOLA, ARTEL_MONEY, ORANGE_MONEY, BRED. |
payerEmail | string | ✗ | Customer's email address. |
payerPhone | string | ✗ | Customer's phone number. |
testReason | string | ✗ | Reason for using test mode (appears in dashboard). |
isTestMode | boolean | ✗ | Set to true to enable test mode (see "Test Mode" section below). |
Make the request with the body and headers from Step 3.
If successful, you receive a response like this:
{
  "data": {
    "amount": 15000.0,
    "currency": "MGA",
    "linkCreationDateTime": 1723850012,
    "linkExpirationDateTime": 1723853612,
    "paymentLink": "https://pay.papi.mg/payment/abc123",
    "clientName": "Client Name",
    "paymentReference": "ORDER-123",
    "description": "Payment for Order #123",
    "successUrl": "https://yourapp.com/payment-success",
    "failureUrl": "https://yourapp.com/payment-failure",
    "notificationUrl": "https://yourapp.com/payment-notify",
    "payerEmail": "customer@example.com",
    "payerPhone": "+261340000000",
    "notificationToken": "xyz789",
    "testReason": "Internal QA",
    "isTestMode": false
  }
}
Important response fields
| Field | Description |
|---|---|
paymentLink | The URL where the customer must be redirected to pay. |
notificationToken | Keep this – you will need it to verify future notifications. |
Extract the paymentLink from the response and redirect the customer:
- Web applications: Open the link in a new browser tab, or perform an HTTP redirect.
- Mobile apps: Use a WebView or the device's default browser.
Tip: Some platforms reset WebViews when the app goes to the background – handle this carefully to avoid losing state.
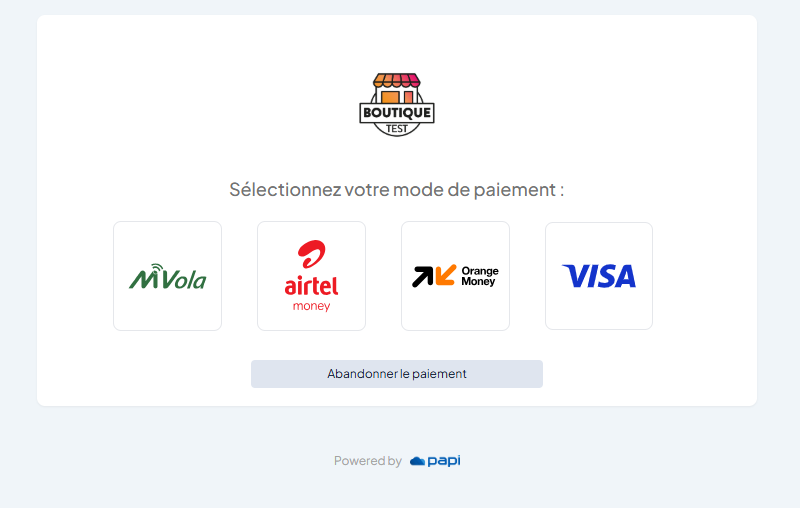
Once redirected, the customer completes the payment on Papi's secure page. After the transaction, they are sent back to your successUrl or failureUrl, and your notificationUrl receives the final status.
Test Mode
Papi offers two ways to test your integration:
1. isTestMode flag in the request
- Set
"isTestMode": truein the request body. - The transaction is marked as a test in your dashboard, but real money is still moved.
- Useful for end‑to‑end testing with real providers (except for mobile money, which does not support non‑real test transactions).
2. Application Test Mode (cards only)
- In your shop's settings inside the dashboard, enable Test Mode.
- Use the following test card details:
- Card number:
4000 0000 0000 5126 - Expiry date:
01/2028 - CVV:
123
- Card number:
- This simulates a card payment without moving real funds.
Example Workflow Summary
- Obtain your API Key from the dashboard (
Avatar icon → Boutiques → select shop → Developer tab). - Create a payment link by sending a
POSTrequest with the required fields. - Redirect the customer to the returned
paymentLink. - Receive a notification on your
notificationUrlwhen the payment status changes. - Verify the notification using
paymentReferenceandnotificationToken. - Update your records and inform the customer.
By following these steps, you can securely accept online payments with Papi. Always test thoroughly using test mode before going live.